
The issue view
Creating issues, the issue page, the status button, activity tabs, description history, changing type, cloning, moving and bulk changes.
Creating an issue
Press Create issue in the top bar or c anywhere. Choose the project and the issue type (Task, Bug, Story, Epic… depending on the project), type a summary and fill in the fields you want. If the project has issue templates, Create from template pre-fills the form — every value stays editable. Which fields appear is decided by the project’s screens, so a bug form can differ from a story form.
A sub-task is created from its parent (see Links & subtasks).
Reading the issue page
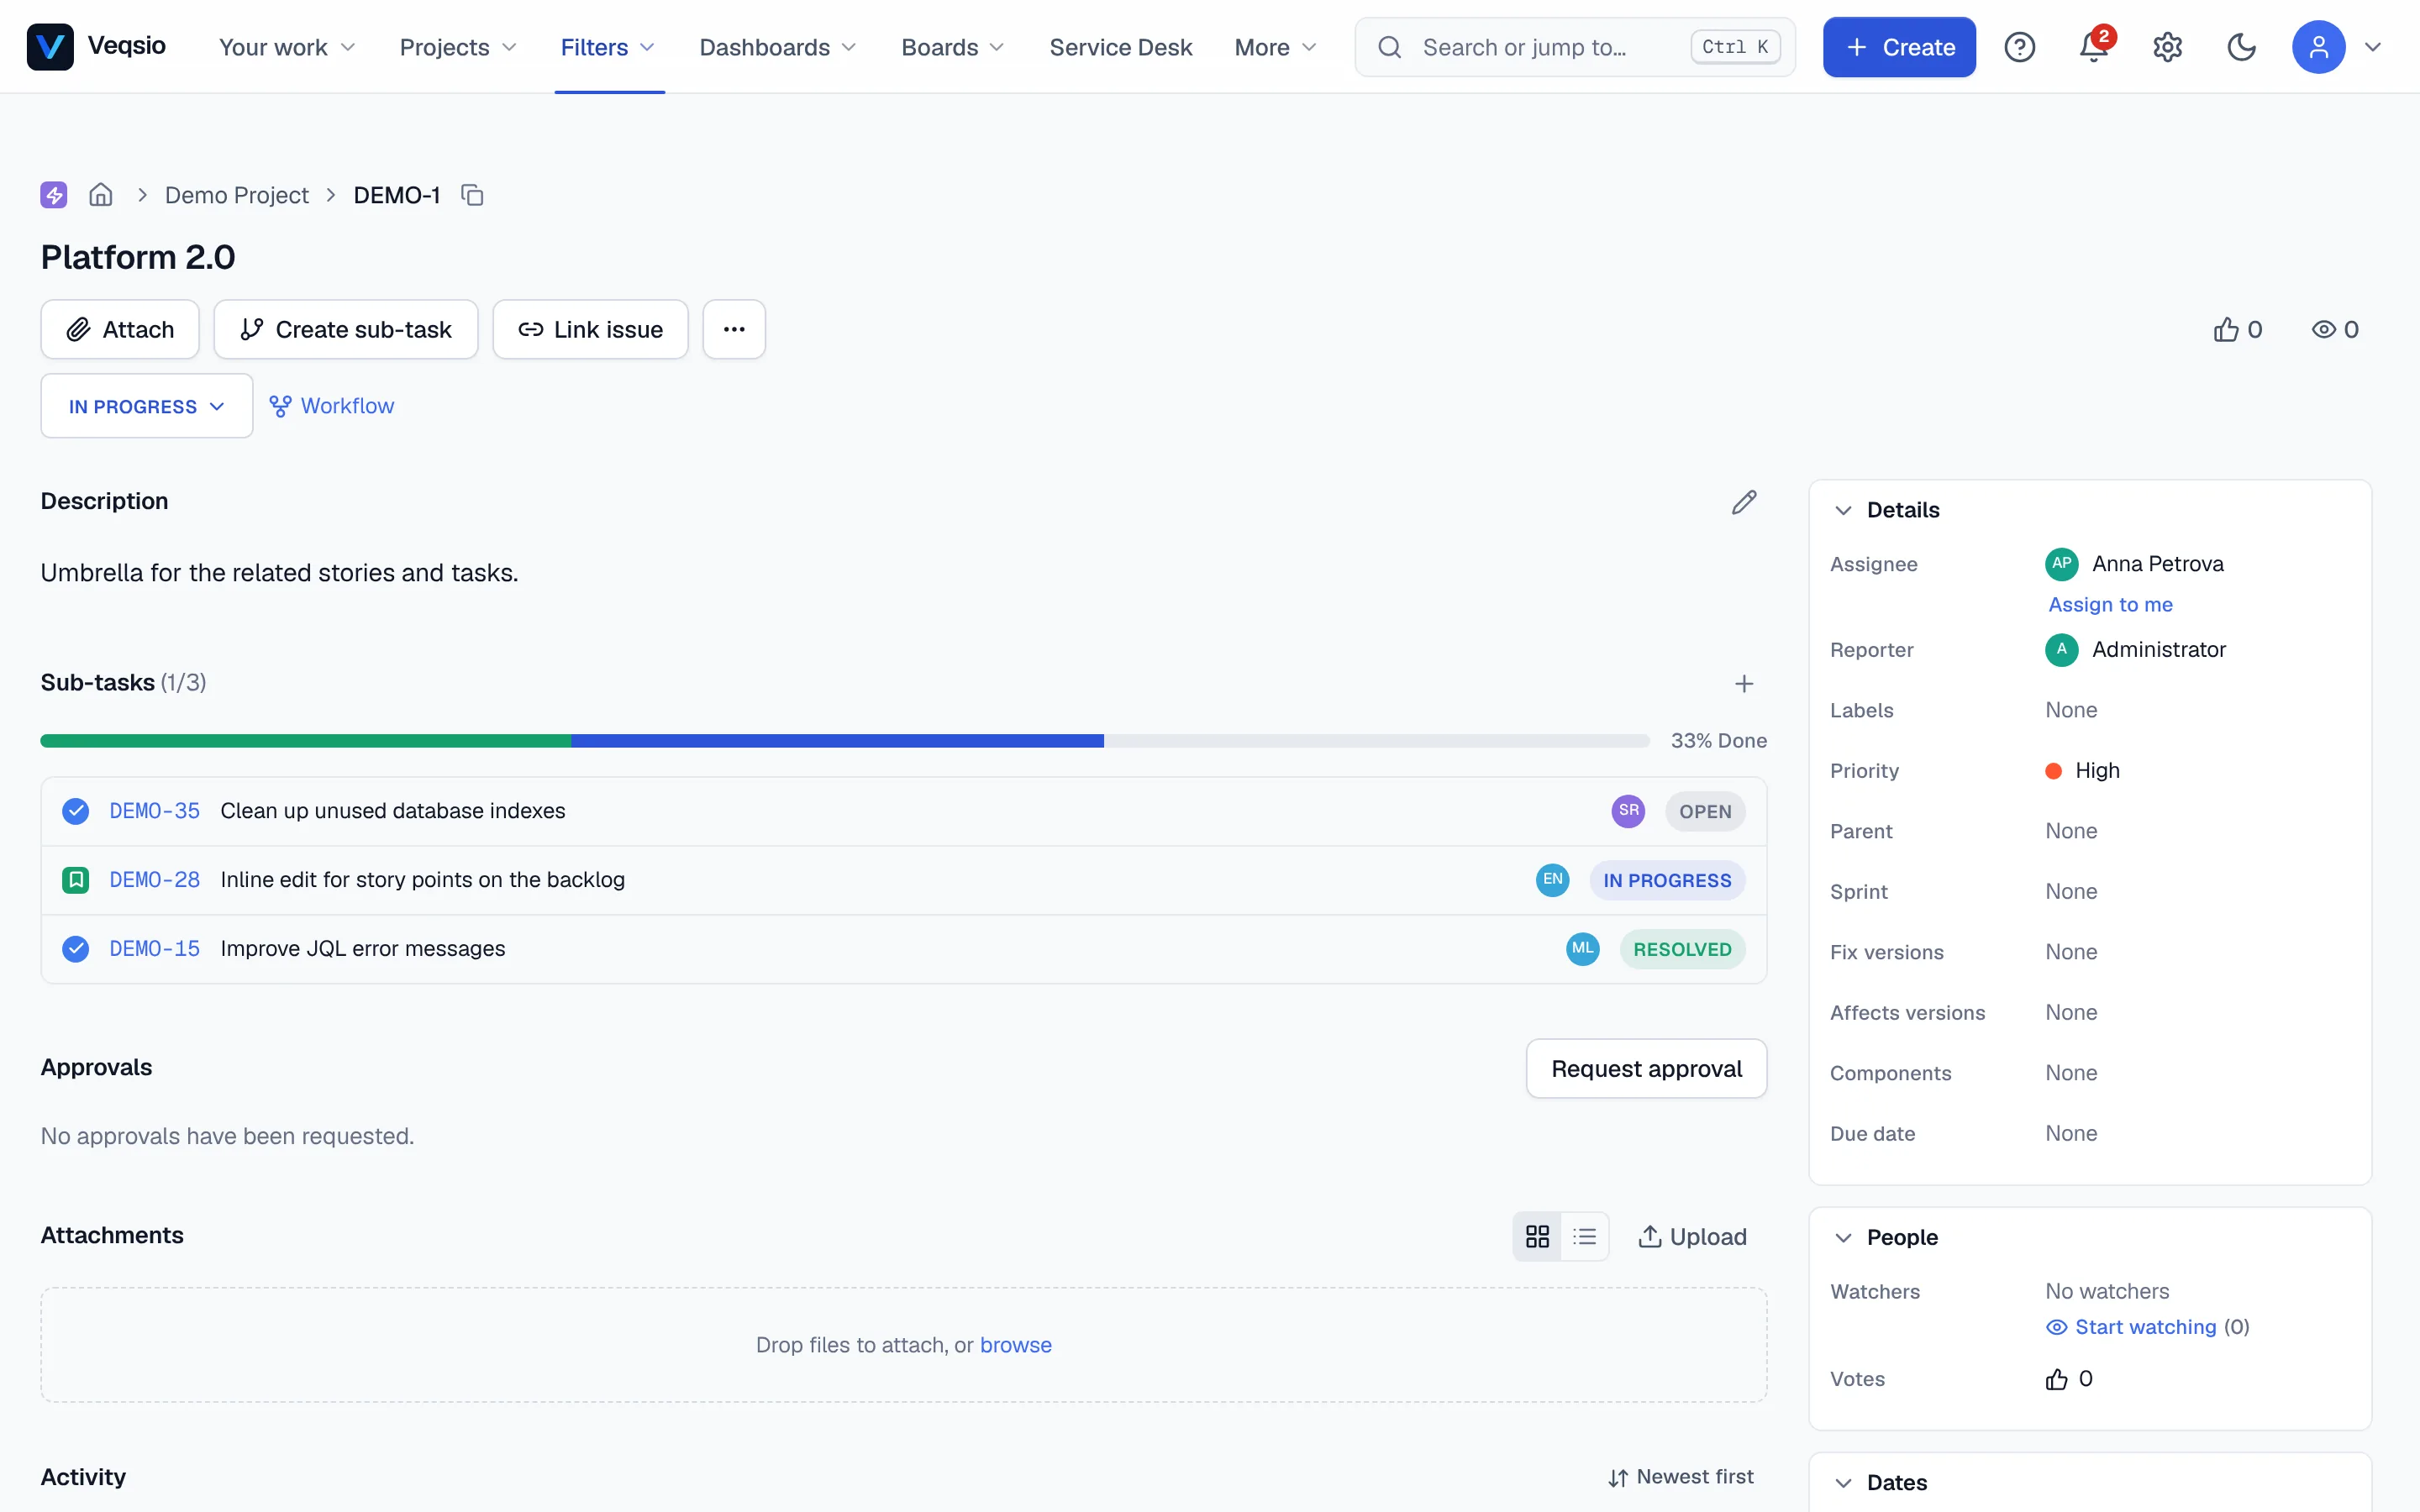
- Header — the issue key (click to copy), the summary (click to edit;
Entersaves,Esccancels), the status button, and a menu of operations. - Description — Markdown with preview, @mentions, task lists, tables (pasting a table from Excel, Sheets or a web page becomes a Markdown table) and pasted screenshots. Press
Eto edit. - Attachments — drop files onto the page or use Attach files. Images get thumbnails and open in a preview; PDFs preview too. Download links are signed and expire.
- Sub-tasks and Linked issues — see Links & subtasks.
- Development — branches, commits, pull requests and build status when the project has a linked repository.
- Approvals — shown when someone has requested a decision on the issue; see Approvals.
- Details panel — assignee, reporter, labels, priority, components, versions, dates, estimates, story points, custom fields and watchers. Click a value to edit it in place.
Everything you edit is saved immediately and written to the history. If two people change the same field at once you are asked whether to overwrite with mine or discard mine, use theirs.
Moving an issue through its workflow
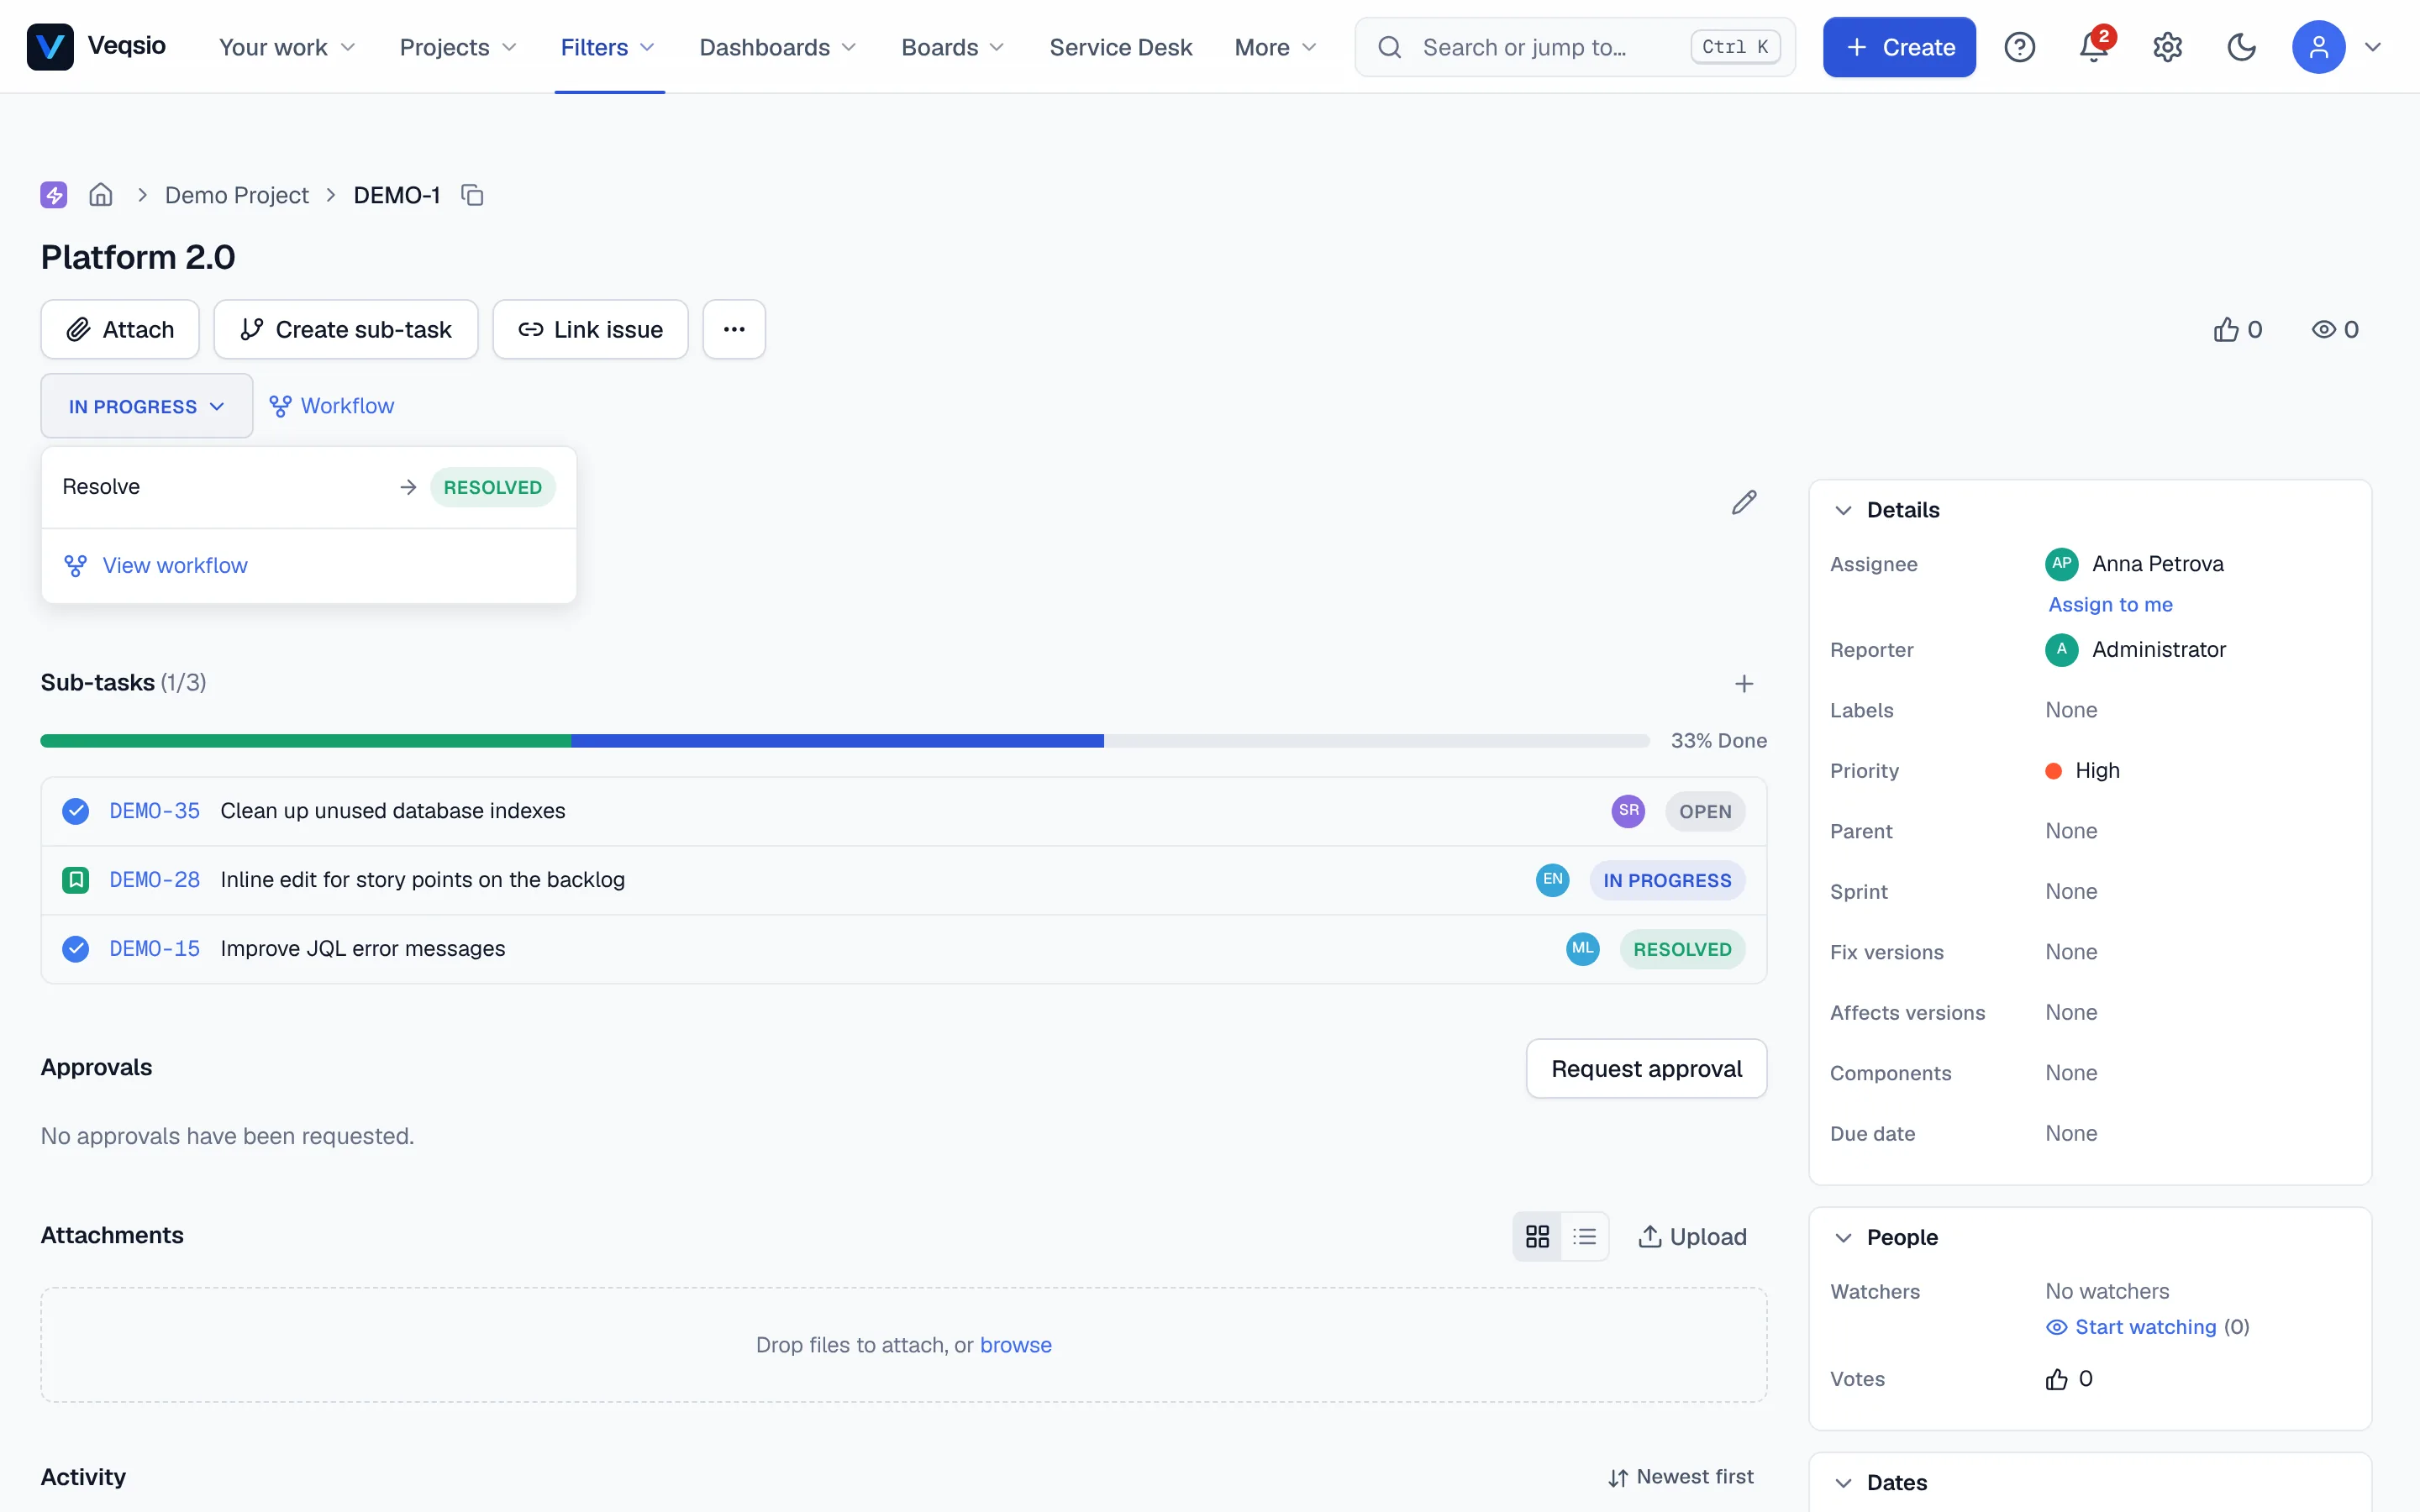
The status button lists exactly the transitions your workflow allows from the current status — and only those you are permitted to use. Pick one. Some transitions open a dialog: a resolution (“Done”, “Won’t do”, “Duplicate”…) when the issue closes, or extra fields the workflow requires. If a transition is missing, the workflow, a condition or your permissions are the reason; the Workflows chapter explains how to read that.
Assigning, watching, voting, flagging
- Assign with
a, or Assign to me withi. - Watch an issue to be notified of changes; Stop watching to leave. The details panel lists the watchers. Watchers are among the people the notification scheme can e-mail; see Comments & notifications.
- Vote for an issue you want prioritised.
- Flag (
f) marks an issue as an impediment. It stands out on boards until you Remove flag. - Labels (
l) are free-text tags; type to add or pick an existing one.
The activity section
Tabs under the description:
| Tab | Shows |
|---|---|
| All | Comments, history and work logs in one timeline. |
| Comments | Conversation only. See Comments & notifications. |
| History | Every change: who, when, old and new value. |
| Work log | Time logged on the issue. See Worklogs & time. |
| Transitions | A bar and a table of how long the issue stayed in each status and when it entered and left it. |
Description history
The history button next to the description opens a drawer listing every version of the text. Select one to see what changed in it, or what restoring it would change, then Restore this version. A restore is saved as a new version, so it can be undone too.
Operations menu
The menu in the header (or . for quick operations — type to filter) offers:
- Clone — makes a copy of the issue; you only confirm the new summary (it starts as “Clone of …”) and land on the new issue.
- Move — to another project (choose the target project).
- Change type — switch the work-item type. A preview shows what will happen first: values of fields the new type does not carry are removed and listed in the description with a warning; if the new type uses another workflow you choose a status in it; a standard issue becoming a sub-task needs a parent. The issue key does not change.
- Create branch — creates a branch named after the issue in a linked repository.
- Copy as prompt — copies the issue as text you can paste into an AI assistant.
- Copy link and Copy issue key.
- Delete issue — permanent; requires the delete permission.
Elsewhere in the product, ?peek=KEY opens an issue in a side panel (the p key in lists) so you do not lose your place.
Working with many issues
In the issue list, select issues (Space or x) and press b for bulk change. Choose an operation — transition, assignee, priority, resolution, labels (add, remove or replace all), components, versions, due date, story points, sprint, watch or stop watching, move to another project, or delete — and the wizard shows a review of what would change and which issues would fail before it applies anything, then a result with the failures listed. Export CSV saves the current list. The keyboard command line (Ctrl+Alt+J) applies a typed command to the selection, and Ctrl+Shift+Enter repeats the last one.
Why a field or button is missing
- The field is not on the project’s screen for that issue type.
- You lack the permission (editing, assigning, transitioning, deleting each have their own).
- The project is archived and read-only.
- The workflow limits who may use the transition.
An administrator can use the Permission helper to see exactly why someone can or cannot do something.